
Simple Homemade Birdbath
Updated: Mar. 21, 2024
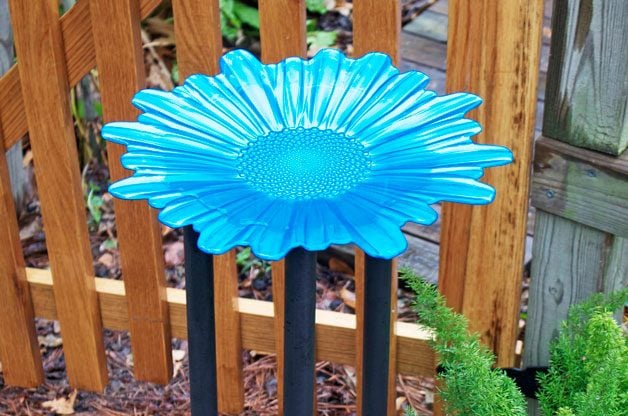
This homemade birdbath is easy enough for anyone to make, and inexpensive too!
To attract birds this spring, I wanted to add another birdbath to my backyard. But like a lot of things, finding a birdbath that fits the bill and doesn’t break the bank isn’t as easy as it seems. I knew what I wanted: something easy to clean, affordable, distinctive and attractive. What I decided on is a simple and versatile homemade birdbath anyone can make.
Materials:
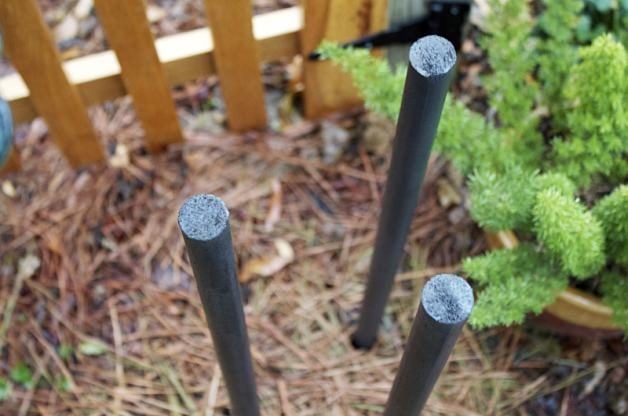
- 3 rods, each about 3 ft. long (either 1-in. doweling, ¾-in. metal electrical conduit or old broomstick handles)
- Exterior-grade paint
- Basin (preferably one with sloping sides, maximum depth of 3 in. and a textured surface for good footing)
- Hammer or mallet
- Piece of scrap wood
Step-By-Step Instructions:
Step 1
Cut the rods to the needed length, depending on how deep you need to sink them in the ground for stability. If you have loose, sandy soil, you will need to sink them deeper than if the ground is hard clay. I found the right length to be about 3 ft.
Step 2
Paint the rods. If you’re using metal conduit, be sure to wash them with a degreasing detergent to remove any oil and grime from manufacturing. Allow to dry completely.
Step 3
Choose the location of your birdbath. A shady spot with nearby shrubs or trees for safe cover is ideal. For maximum enjoyment, make sure you’ll be able to see the bath from your favorite bird-watching window.
Pound the rods into the ground in triangle formation to provide a stable base. The size of your chosen basin will determine the distance between rods.
Step 4
Place the basin on top of the rods. Fill the bowl with water and check to see if the base is level. If not, adjust the depth of the rods until the water is level. Place a stone or two in the water to provide an extra perch for birds and hold the bowl in place. Don’t forget to clean and fill your homemade birdbath regularly!
