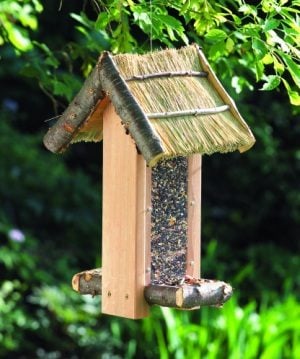
Cozy Cabin DIY Bird Feeder
Updated: Apr. 24, 2020

Our photos walk you through as you learn how to build a bird feeder with a rustic thatched top.
With so many different kinds of bird feeders available these days, there’s certainly something out there to suit any style. If you’re looking for a feeder that’s rustic but still cozy and fun, try this thatch-topped design. While it’s a little more challenging than some of our beginner designs, we’ve got plenty of photos to walk you through the process. So gather your tools and learn how to make a DIY bird feeder in cozy cabin style!
Materials:
- One 2×4 x 4 foot cedar (or pine)
- One 1×6 x 4 foot cedar (or pine)
- 1/16″ acrylic (cut to size at home center or hardware store)
- 1 lb. 2-1/2″ rust-resistant screws
- 1 lb. 4d galvanized casing nails
- 12 #6 x 1/2″ pan-head screws
- Cut roof thatch from two brooms (old ones are fine), or try hay, twigs, reeds or similar material.
Step-By-Step Instructions:
Step 1
Cut your wood pieces as follows:
- 2: 1-1/2″ x 3-1/2″ x 16″ sides
- 1: 3/4″ x 5-1/2″ x 8-1/2″ roof
- 1: 3/4″ x 4-3/4″ x 8-1/2″ roof
- 1: 3/4″ x 3-1/2″ x 9-1/2″ feeder tray
- 1: 3/4″ x 1-1/2″ x 3-1/2″ top brace
- 2: 5″ x 10″ x 1/16″ acrylic
- 4: 1-1/2″- to 2-1/2″-dia. x 8-3/4″ branches cut lengthwise and mitered for roof edge.
- 4: 1-1/2″- to 2″ dia. x 3″ branches cut lengthwise for sides of feeder tray
- 2: 1-1/2″- to 2″-dia. x 5″ branches cut lengthwise for front of feeder tray
- 4: 1/4″- to 1/2″-dia. x 8-1/2″ twigs to hold thatch on roof
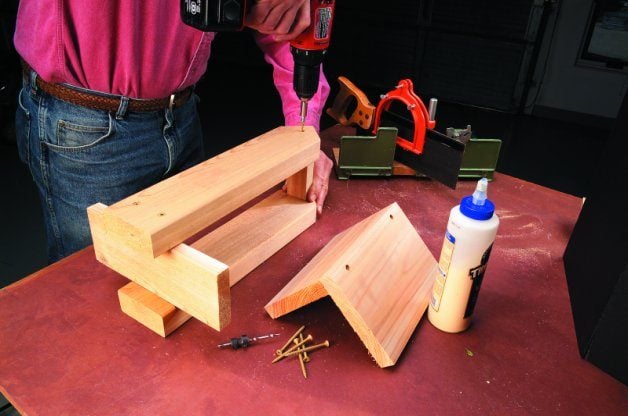
Step 2
Cut the sides of the feeder from a 2×4 and the roof, top brace and feeder tray from a 1×6. Attach with 2-1/2-inch rust-resistant screws and exterior glue. Don’t attach the roof to the sides—it slides up hanger wire so seeds can be poured into the bin from the top.
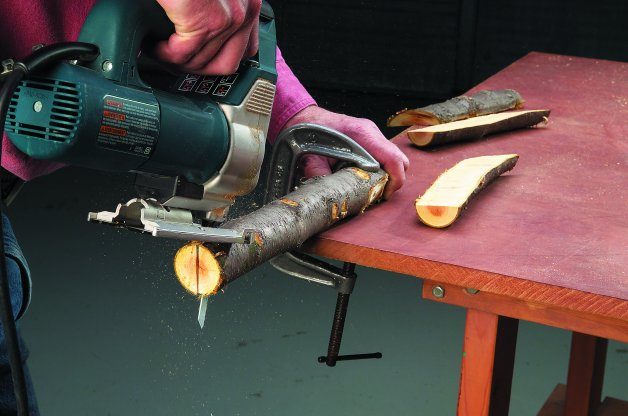
Step 3
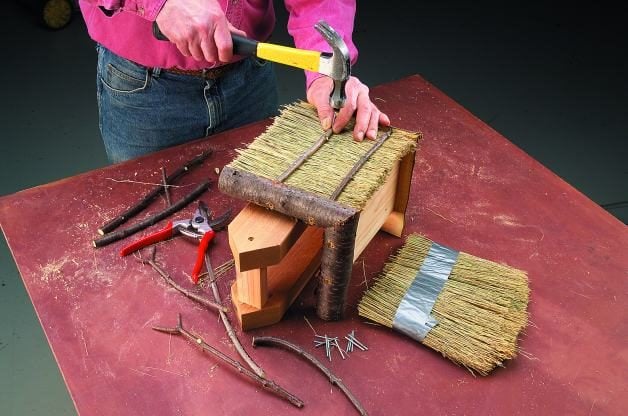
Rip a 1-1/2- TO 2-1/2-inch branch in half with a jigsaw, miter the ends, then attach to the roof edges with 2-1/2-inch screws. Predrill all screw holes, and don’t worry if the cuts are rough and uneven—they’re supposed to be. The branches should be more or less flush with the bottom edge of the roof boards.
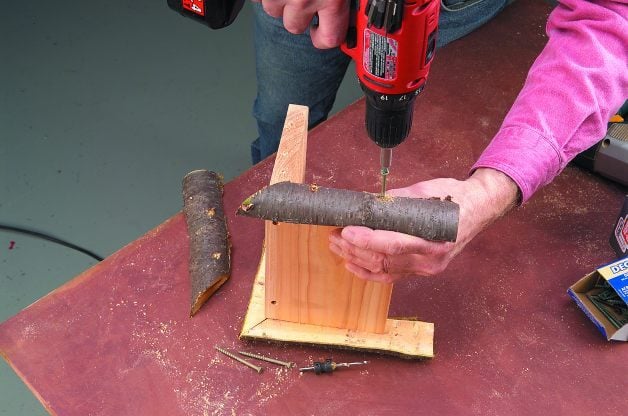
Step 4
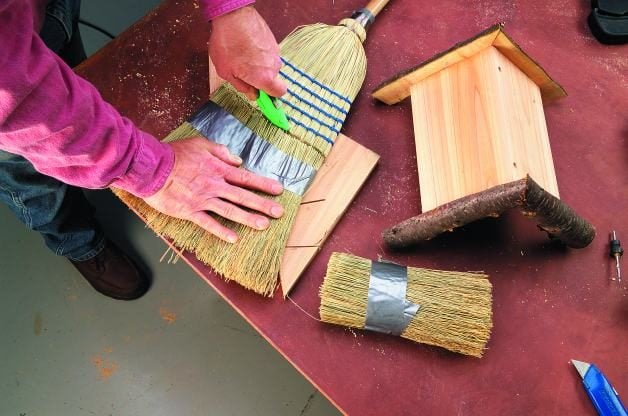
Tape the thatch from brooms to hold it together, then cut it 7-1/2 inches long with a sharp knife. Arrange the thatch on the roof and nail two green twigs to each side to hold it in place. The feeder makes a convenient brace (as shown). Trim ragged edges with scissors after the thatch is nailed down.
Step 5
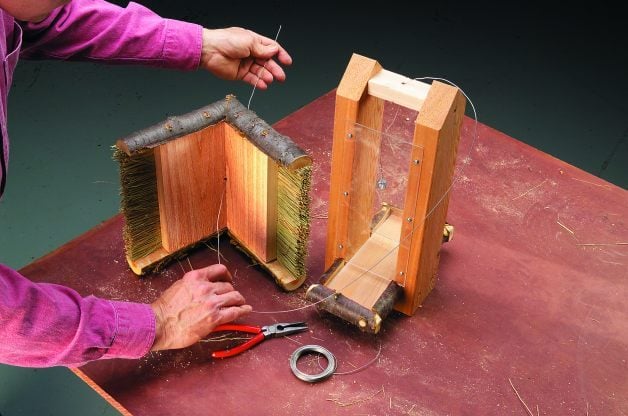
Drill three screw holes slightly bigger (5/32 inch or more) than the screw size through each side of the acrylic. Attach each piece of acrylic with six pan-head screws, but don’t overtighten, or it might crack. Leave a 1/2-inch gap at the bottom for the bird feed to flow out.
Step 6
Screw or nail on half branches around the perimeter of the feeder tray to keep the feed in place. Finally, drill a hole at the center of the roof and the top brace, and slip wire or rope through for the hanger.