
DIY Bird Feeder for Peanuts
Updated: Apr. 24, 2020
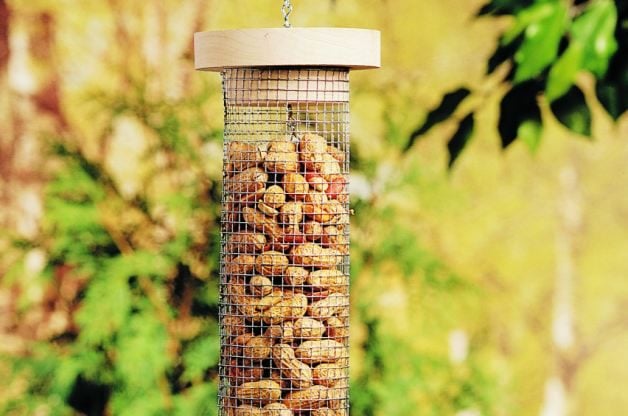
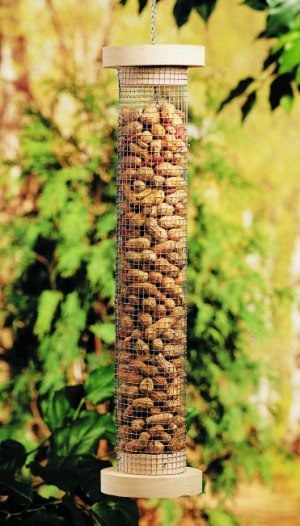
Offering peanuts is great for attracting a wider variety of birds. This DIY bird feeder makes it easy.
Need some help attracting birds to your backyard? Try adding a new food into the mix. Peanuts are a draw for woodpeckers, blue jays and nuthatches. This simple DIY bird feeder is a perfect way to try this food source in your yard. As a bonus, squirrels may be so busy visiting this feeder that they’ll leave the others alone!
Materials:
- One 2-foot 1-inch x 6-inch board
- Approximately 12 inches x 18 inches of hardware cloth with 1/4-inch squares
- 36-inch-long light-duty chain
- One screw eye
- Netting staples
- Waterproof carpenter’s glue (or 1-5/8-inch deck screws)
- Band, saber or scroll saw
- Wire cutter
- Needle-nose pliers
- Soldering iron (optional)
Step-By-Step Instructions:
Step 1
Cut out four disks-two should measure about 4-3/4 inches across, and two should measure about 3 inches across-with a band, saber or scroll saw. Make the circles with a compass, or simply trace the rims of quart and 1/2-pint paint cans (or other cans similar to the dimensions above). Cut the smaller disks carefully—they should be as close to identical as possible.
Center and glue (or predrill and fasten with three 1-5/8-inch deck screws) each small disk to a larger disk. Clamp these pieces together until the glue completely dries. This will form the top and base of the feeder.
Step 2
Fasten one end of the chain to a screw eye. Open the eye with two small pliers. (Twist in opposite directions until the eye opens just enough for the chain to be inserted.) Close the eye with a pliers.
Drill a pilot hole in the center of one of the small disks and turn in the screw eye. This will become the feeder’s base.
Step 3
Wrap hardware cloth around the completed base. (If using a 1/2-pint paint can to determine the size of the smaller disks, wrap the hardware cloth around the base and the can, which should be positioned about 10 inches higher than the base. Wrap heavy-duty rubber bands around the base and can to form a cylinder.)
Cut the hardware cloth about 1/4 inch beyond the last complete square where it comes together. This will leave small wire tabs on one end. Now you can remove the rubber bands and paint can.
Step 4
Bend hardware cloth into a cylinder and attach to the feeder’s base with netting staples (with the chain inside). Join the two ends of hardware cloth to form a cylinder. Secure by wrapping the tabs around the other end using needle-nose pliers. Make sure the cylinder isn’t too tight at the feeder’s top, otherwise it will be difficult to lift up and close when filling with peanuts.
Tip: We recommend spot soldering the wire at the seam about every 2 inches for a better hold. If there is excess wire at the tabs, trim with a wire cutter.
Step 5
The chain can be looped for hanging or attached to an “S” hook. Slide the top up along the chain and then fill the cylinder with peanuts, unsalted and in the shell. You’ll be amazed by how fast the peanuts start attracting birds!