
Build a License Plate Birdhouse
Updated: Mar. 21, 2024
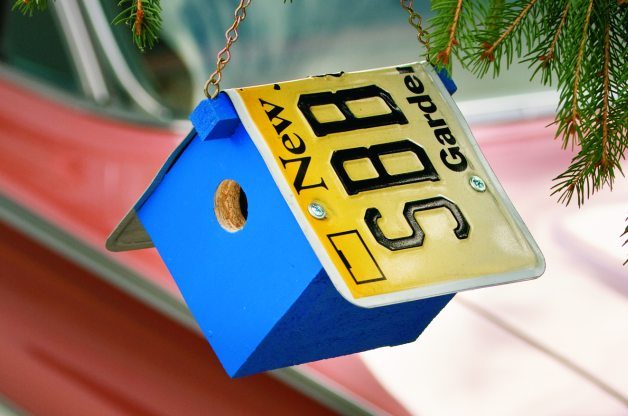
Personalize a DIY birdhouse with an old license plate, and you’ll have a real one-of-a-kind place for birds to call home!
This simple DIY birdhouse takes on new character when you add an old license plate for a roof. You could pay big bucks for one of these license plate birdhouses at craft shops, or learn to make your own for just a few dollars!
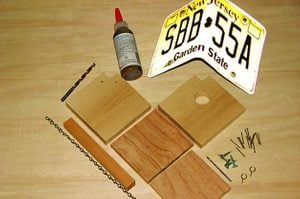
Materials:
 2 pieces of pine, 3/4 x 4-1/2 x 4-1/2 inches
- 1 piece of wood or plywood, 1/2 x 4-1/4 x 4 inches
- 1 piece of thin wood or plywood, 1/2 x 4 x 4 inches
- 1 piece of pine, 3/4 x 3/4 x 7 inches
- 12 1/4-inch brad nails or small siding nails
- 4 1-inch pan-head screws or roofing nails
- 2 1/4-inch screw eyes
- 1 12-inch piece of chain for hanging
- 1/4-inch drill bit
- 1-1/8-inch hole saw
- Primer and outdoor paint (optional)
- License plate
- Wood glue
- Saw
- Hammer
- Drill
- Ruler
- Pencil
- Needle-nose pliers
Step-By-Step Instructions:
Step 1
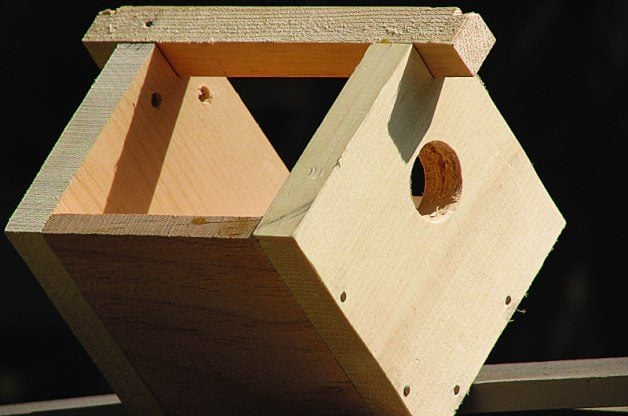
Cut two pieces of 3/4-inch-thick pine into a square, 4-1/2 x 4-1/2 inches. These will be the front and back of the birdhouse.
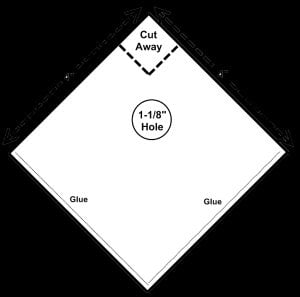
Take a ruler and mark off a 3/4 x 3/4-inch square on one of the corners of each block of wood. Use a small hand saw to cut out the corners.
Measure approximately 2-1/2 inches down from the notch. This is where you will drill the entrance hole, using the 1-1/8-inch hole saw.
Step 2
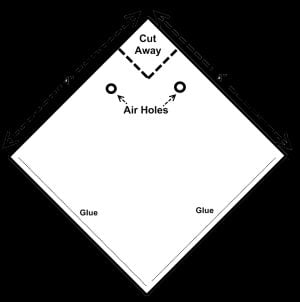
With the notched corner at the top, use the 1/4-inch drill bit to drill two air holes, about an inch apart, just under the notched portion of one of the blocks of wood. This will be the back of the birdhouse.
Step 3
Taking a piece of 1/2-inch-thick wood, cut two pieces, 4-1/4 x 4 inches and 4 x 4 inches.
Place the back of the birdhouse, which contains the air holes, flat on your work surface, and apply a small bead of glue along the two bottom edges. Attach the thinner pieces of wood, finishing off the piece with the front of the birdhouse that has the entrance hole.
After the glue sets, hammer in some brad nails. If you use four on each side, this should secure the house nicely.
Take the 3/4 x 3/4 x 7-inch piece of wood and center it over the notched corners. This will be a support for the roof, as well as a place to put the screw eyes for hanging. Secure this piece with a little wood glue and a couple of nails on each side.
Step 4
Once the glue is completely dry, you can prime and paint your birdhouse, or use a stain and sealer instead. Just be careful not to get any paint inside the birdhouse where it could harm the birds.
Step 5
Find the center of your license plate and bend it to a 45-degree angle. Center it over the roof support on the house.
Using a pencil, mark where the holes of the license plate will be on the edge of the birdhouse.
Drill holes for the pan-head screws or roofing nails; this will prevent the wood from splitting when you put in the hardware. If you don’t have pan-head screws, find a screw or nail with a large enough head to secure the license plate.
Put the plate back on top of the birdhouse and attach with the large screws or nails.

Step 6
About 1/2 inch from the edge of the roof support, attach a screw eye, one on each end. These will hold the chain you will use to hang your birdhouse.
With the needle-nose pliers, open a link at each end of the chain and attach it to the screw eyes. Now your birdhouse is ready to hang!