Bowling Ball Garden Art Bumblebee
Updated: Mar. 21, 2024
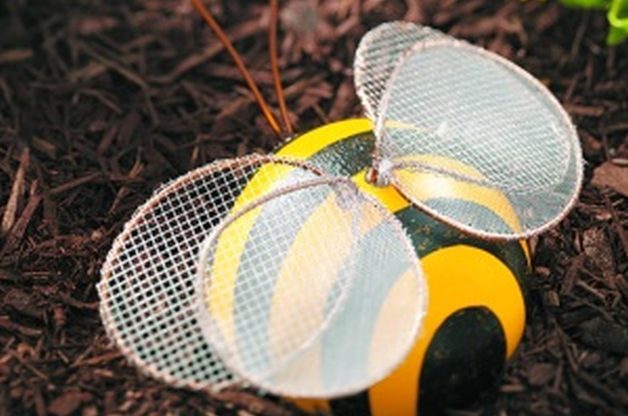
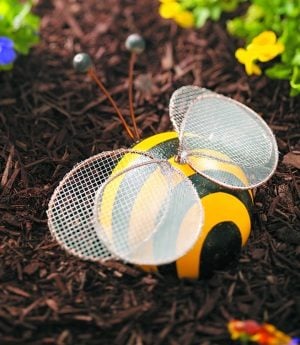
Recycle an old bowling ball into a bumblebee with this bowling ball garden art project!
We love new ideas for recycled garden crafts. Our bowling ball garden art ladybugs were so popular, we decided to try a bumblebee variation!
Materials:
- Bowling Ball
- Silicone caulk
- 101″ #6 copper wire. Have it cut at the hardware store at these lengths:
- Two—8.5″ lengths for antenna
- Two—20″ lengths for top wing
- Two—22″ lengths for bottom wing
- Window Screen: Two—8.5″ squares
- Hardware cloth: Two—9.5″ squares
- Two—1″ round wooden beads
- Kilz exterior primer
- Yellow exterior latex paint
- Black exterior latex paint
- 26 gauge bare copper wire (approx. 60-70″ for each wing)
- Brush or sponge
- Wire cutter
Step-By-Step Instructions:
Step 1
Prime the bowling ball and paint it with yellow paint. Apply painters tape to the ball where desired and paint or sponge black stripes on the ball. Tip: Allow primer and paint to dry between coats.
Step 2
Paint beads black and allow to dry. Bend the 8.5″ lengths of wire slightly to make antennae. Squirt a little dab of caulk into each bead hole. Push one bead onto end of antenna. Repeat for the next antenna.
Step 3
Bend the 20″ lengths into an oval shape for the bottom set of wings. Bend the 22″ lengths into an oval shape for the top set of wings. Bend down about 1-1/2″ at the ends to place in the fingerholes.
Step 4
Center 20″ and 22″ wire ovals over the window screen material and “sew” the thin copper wire to the wire to attach screening. Trim to 1/4″ past the edge and bend hardware cloth edges around copper wire. Tip: We found it was easier “sewing” from the underside of the wing
Step 5
Squirt caulk into finger holes to attach antenna and wings. Let dry for 24 hours. Touch up areas on finger holes.