
The Ultimate Guide To Backyard Bird Photography

Updated: Nov. 16, 2020
Get expert bird photography tips from a professional bird photographer on how to turn your backyard into an ideal space for capturing bird photos.
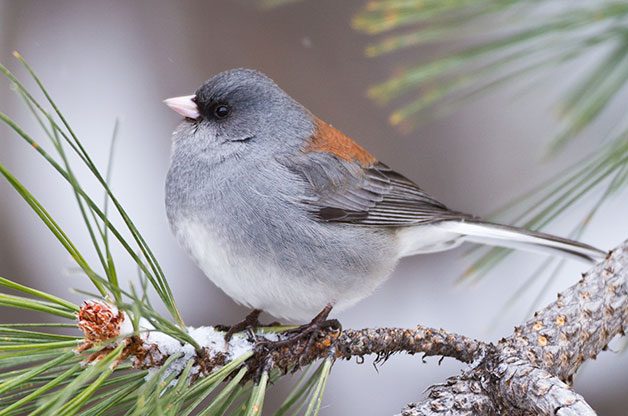
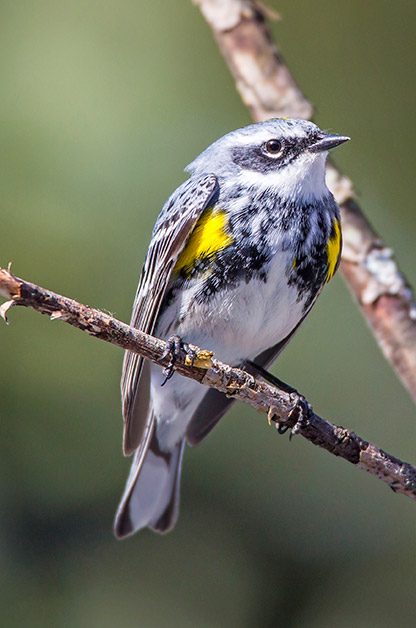
The scene was picture perfect. A yellow-rumped warbler flitted down from the birch and landed on a bare branch. The bird, a male in spring plumage, paused for just a moment. My camera, focused on that very spot, needed no adjustment. I clicked the shutter. This perfect setup was no accident. I’d placed that dead branch right where I wanted it between the forest edge and my bird feeders.
Backyard bird photography can be amazing and rewarding. In fact, some of the best images of birds I’ve made have been from my very own porch. But to be successful, yard photography requires a bit of prep, planning and patience. Here are a few tips to get you started.
Build Bird-Friendly Habitat
To photograph birds, you have to provide a reason for them to visit. Natural landscaping, using plants native to your region, is the best tool to lure birds to your yard. Whether you live on a suburban lot or a sprawling rural spread, the species of plants that grow around your home will dictate the abundance and diversity of birds that visit.
I live on 10 hillside acres north of Fairbanks, Alaska. The bird life here is highly seasonal, but during the brief spring and summer, quite a few species stop to visit. The lower portion of my property includes a small creek and some wetlands. This year a pair of solitary sandpipers raised a clutch of young by the creek, providing me with a unique photo opportunity.
The forest begins just up the hill and is dominated by wild vegetation. The trees, a mix of birch, aspen and spruce, host the resident birds of the boreal forest: black-capped and boreal chickadees, redpolls, crossbills and gray jays. Seasonally, many migrants stop in to breed or rest during the summer.
Around the house is a small open yard where I’ve put my feeders. The food lures the birds from the trees out into the open, where it’s easier to photograph them.
It’s not difficult to bring some of these basic elements to your own space, in different forms. A water feature, regardless of size, will bring in species that might not otherwise drop by. Insect-eating and aquatic birds won’t usually visit a feeder, but if you provide some water you give them a reason to stop. A small pond, even a few square feet, is often enough.
Native trees and shrubs are vital. These provide cover, food and a familiar habitat for local birds. Here’s how to create winter shelter for birds.
Offer Birds Multiple Food Sources
Carefully distributed food sources are crucial to improving your backyard bird photography. Several different types of feeders will get birds accustomed to visiting your yard. Before you start taking pictures, however, take down all but one feeder. This keeps the birds from flitting through in unpredictable ways. And having a single food source will focus their—and your—attention, for better photo opportunities. Psst—these are the 10 types of bird feeders you need in your backyard.
Give Birds Places to Perch
Feeders don’t make photogenic perches. Plastic parts, wooden dowels and shelf feeders scattered with seed can look artificial and distracting. Instead, place natural-looking branches near your feeder. As birds visit, they’ll land on these natural perches while they wait their turn at the seed or investigate the food. Use only one or two branches, maximizing the chance that the birds will land where you want them. These perches should be close to where you will be shooting your images, particularly if you don’t have a long telephoto lens. A position right outside your window can be a perfect location. Follow these tips to take breathtaking hummingbird photos.
Pay Attention to the Background
Pay attention to what’s behind your setup. Vegetation several yards back is best. If positioned well behind the bird, leaves will blur into pleasing washes of color. Colorful flowers can be a pretty addition, but be careful that they supplement your primary focus instead of distracting from it. Avoid houses, fences and vehicles; even blurred by distance, their geometric patterns cause distraction.
Look at the Light
Typically, morning and evening light are the best for photography. The low-angle sunlight at these hours provides a warm tone that flatters almost every subject. The drawback is that sunlight, no matter how warm, is directional. If it’s bright, have the sun behind you, so the bird doesn’t have shadows crisscrossing its body. The diffuse light of a cloudy day is much easier to deal with. Direction doesn’t matter as much, allowing you to concentrate on your compositions and backgrounds.
Don’t miss these simply stunning photos of cardinals.
Learn to Use Your Equipment
I’ve purposely made it this far without mentioning a camera, because good photography has much less to do with your gear than with your creativity, dedication and planning. Your camera doesn’t have to cost thousands of dollars and have a lens as long as your leg. Many point-and-shoots, and even cellphones, will take fine pictures if you’ve planned your setup. That said, a camera with good optics and decent resolution will of course help your images look their best. A tripod, even a cheap one from a discount store, provides a stable platform to shoot from. Check out the birding gadgets and gear you never knew you needed.
Putting It All Together
Your perches are set up, the feeders are full, and the morning sun is peeking over your shoulder to bathe the scene in sweet light. Now the most important part of photography comes into play: patience. Wait. Remain as still as possible, pay attention and keep your finger on the shutter. The light will shift. Birds will come and go, somehow avoiding your perfect setup. You may get frustrated and think something needs to be adjusted, but resist the urge to move. Eventually your quarry will appear. A bright songbird will land on your sunlit perch. Through the viewfinder, it will look startlingly handsome against the clean background. You smile. Click.
More Bird Photography Tips for Better Bird Photos
Remember composition
Don’t put your subject smack in the middle of the photo. If the bird is facing left, keep it on the right side of the frame. And don’t get too close. Give the subject some breathing room in the photo for context.
Tell a story
A portrait of a perched bird against a clean background is good, but a picture that tells a story is much better. Photos of birds in flight, eating, singing or in courtship are more compelling. Check out breathtaking photos of mourning doves.
Know your camera
Whether you have a point-and-shoot, a smartphone or a professional-grade digital SLR, you’ve got to know how to use it. Read your manual and learn how to adjust settings quickly and without fuss.
Practice Taking Photos
There are no shortcuts to becoming a good photographer. You’ve got to be out there taking photos, and lots of them.
Originally Published: October 15, 2014