
Pearl crescent butterflies are delightful visitors to your yard or garden. Here are answers to the most common questions asked about these beautiful insects.
Where can I find pearl crescent butterflies?
Look for pearl crescents in most of the U.S. east of the Rockies and parts of southern Canada. They’re commonly spotted in gardens, fields, roadsides and near woodlands. Learn how to grow a wildflower meadow for butterflies,

What kind of markings do they have?
The upperside of each wing is orange with large black patches and stripes. A small, pale crescent moon-shaped marking is on the underside of each wing. Follow this helpful cheat sheet to identify butterflies.
What do pearl crescent butterflies eat?
Asters are their favorite nectar source and your best bet for attracting adult pearl crescents. But you can attract these butterflies with almost any nectar producing flowers. Try these six go-to flowers for butterfly gardens.
Where do they lay their eggs?
Adults lay minuscule white-green eggs in clusters on a variety of asters, which are their host plants. Consider planting these late blooming asters that attract butterflies.

What do the caterpillars look like?
Pearl crescent caterpillars are brown with a cream stripe down the side and have many small spikes. Take this quiz and see how many caterpillars you can identify.

Serviceberry
Amelanchier spp., Zones 2 to 9
This native perennial plant is one of the earliest sources of summer fruit for birds, and it hosts caterpillars. It’s white spring flowers are followed by small berries that turn red to purple as they ripen in summer.
Growing needs: Serviceberry grows 10 to 25 feet tall when in full sun and the lightly moist or damp soil it prefers. It tolerates some shade.
Check out the top 10 berry trees and shrubs birds love.

Columbine
Aquilegia vulgaris, Zones 3 to 8
Hummingbirds love the bright spring flowers of this perennial plant which show up around the same time as daffodils and tulips (see more early-blooming spring flowers). The bell-shaped blossoms are backed by spurs that contain nectar that hummingbirds need.
Growing needs: Columbines prefer partial shade and thrive in woodland wildflower gardens. For another burst of green, cut the plant back to encourage new foliage.
Next, check out tube-shaped flowers that attract hummingbirds.

Elderberry
Sambucus nigra canadensis, Zones 3 to 9
The flowers on this shrub provide nectar and are followed by tasty berries appearing in late summer. Give this shrub plenty of room to spread and grow, then watch as butterflies and bees gather on flowers and birds flock to the ripe fruit. Elderberry suckers form large and lush thickets, which are perfect hiding spots for songbirds.
Growing needs: Although it prefers full sun and moist soil, it tolerates drier conditions once it’s established.

Blazing Star
Liatris spp., Zones 3 to 9
The purple flower spikes attract hummingbirds and then turn to seed in fall. The nectar of this spiky plant is a butterfly favorite, especially when it comes to the silver-spotted skipper. Once the flowers fade, birds favor the seeds. Blazing star reaches up to 6 feet tall, but some types, like Kolbold, are much shorter, measuring roughly 18 inches.
Growing needs: Blazing star can be planted in poor soil, but needs plenty of sun. Many species are native to the eastern U.S. Read more about how these blazing star attracts butterflies.

Autumn Inferno Cotoneaster
Cotoneaster ‘Bronfire’, Zones 5 to 7
Look no further for a fiery fall accent. Autumn Inferno is a shrub that offers fiery red fall foliage for you and small red berries that birds can’t get enough of. They attract berry-eating birds like robins, bluebirds and cedar waxwings.
Growing needs: It grows about 5 feet tall and is a great privacy hedge. Grow it in full sun to part shade.
Discover the best fall shrubs to grow in your yard.
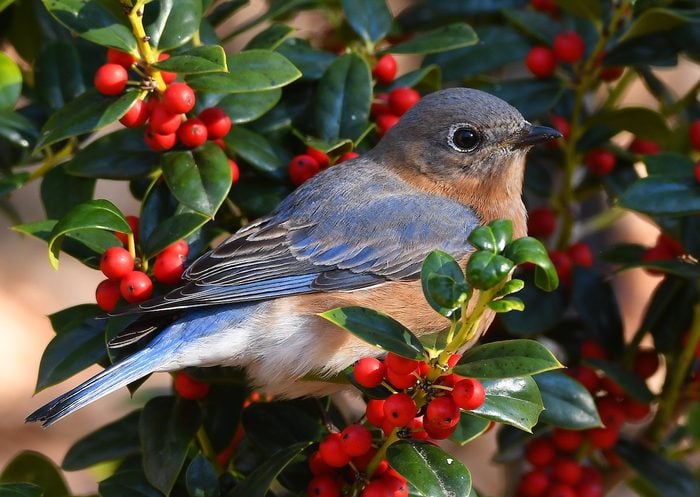
Holly
Ilex spp., Zones 5 to 9
Its long-lasting berries are an important winter food source. Among the many bird-attracting species are the American holly tree (I. opaca), Zones 5 to 9, and the winterberry shrub (I. verticillata), Zones 3 to 9. Many also have attractive foliage, especially the variegated cultivars.
Growing needs: American holly can be planted in full sun to part shade, is low maintenance, and tolerates clay soil.
Check out simple tips to attract winter birds.
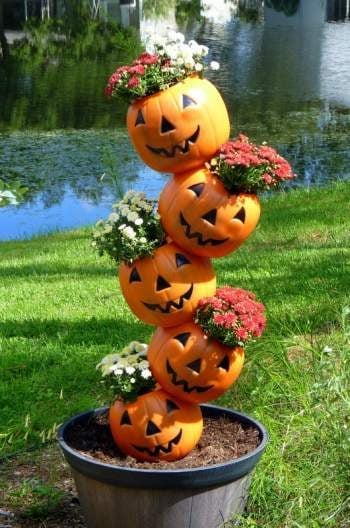
I’ve always been a fan of the “tipsy pots” planters, with their whimsical style and endless opportunities for customization. They can be used as address markers and as bases for birdbaths, and a while back I created a miniature version with succulents perfect for your desktop or dining room table. When I recently came across a bin of $1 plastic pumpkin candy buckets, I knew I had to give this project idea a try.
This is fairly inexpensive project. You also need a sturdy garden stake or metal rod at least 4 feet tall and a power drill with a 3/4 inch spade bit. If you’re using live plants, you’ll need potting soil to fill the pumpkins, too. Or if it’s too late in the season for live plants where you live, try using artificial flowers and some styrofoam inserts to hold the flowers in place.
How to Make a Tipsy Pumpkin Planter
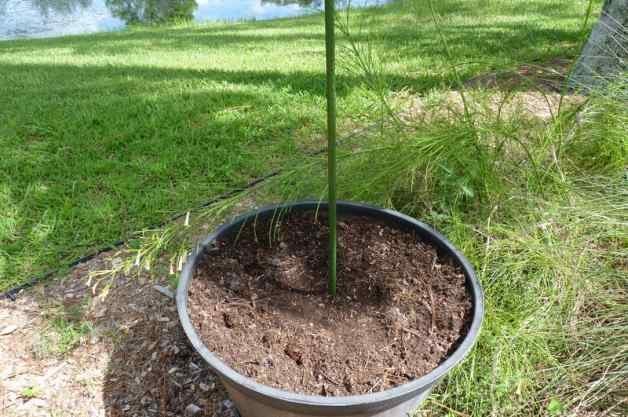
Start by finding a stable place to insert the stake. I used an empty whiskey barrel planter in my backyard. If you’re doing this project in a pot on your front porch, consider placing it in a corner so it doesn’t get knocked over. The pumpkin stack is reasonably sturdy, but it’s best to be cautious.
Next, cut the plastic handles off the pumpkins. Using a 3/4 inch spade bit, enlarge the holes on the bottoms of the pumpkins (or add one in the center of each if there isn’t one already). You’ll also be expanding one of the handle holes on each pumpkin. The side depends on which way each pumpkin will tip. (See below.) Go slowly with the drill at first, so you don’t crack the pumpkin. After drilling, make sure the holes are large enough that your pumpkins will slide easily down over the stake.

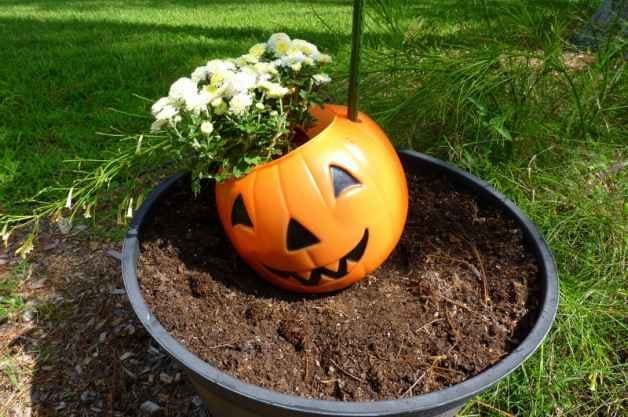
Take your first pumpkin and slide it down over the stake, going through the middle hole in the bottom and the enlarged handle hole. Nestle the pumpkin firmly down into the soil. Fill the pumpkin with potting soil and add plants.
Repeat with the next pumpkin, this time sliding the stake through the opposite enlarged handle hole. Rest it on the pumpkin below it, then fill with soil and plants. Make sure that everything is still sturdy as you continue to add the rest of the pumpkins and plants.

Though this planter is reasonably steady, it’s not quite as sturdy as those made with terra cotta pots. Use care when watering, and consider disassembling or moving inside during very high winds. At the end of the season, this planter is easy to take apart and store for next year.

I think I’m going to add some additional mums around the base of the pumpkins in the pot, for a more finished look. Now it’s your turn to add this easy decoration to your garden for Halloween.

Each year, I remind fellow birders that leaving your hummingbird feeders up will not cause the birds not to migrate. Although they might fight like crazy over the feeder with other hummingbirds, they don’t like it enough to risk the freezing northern winters with no bugs for them to eat. Psst—here’s how hummingbirds survive winter. With my annual reminder done, I thought I’d let you know why it’s important to not take hummingbird feeders down yet.
When should you put out hummingbird feeders in spring?
Migrating Hummingbirds Need Energy
Late migrating fall hummingbirds can use the extra energy from a feeder as they move south. It’s important for these birds to have an easy source of food so they can quickly refuel after cold nights. (Here’s the sugar water recipe). Although your summer resident hummers might be gone, there are still some to the north that will be coming through! If you take hummingbird feeders down too early, these birds will be lacking a source of food they need for the long journey ahead. Psst—make sure to grow late-blooming flowers to help fall hummingbirds out even more.
Where do hummingbirds sleep at night?
Look for Rufous Hummingbirds in Fall
Rufous hummingbirds come east every year and you are more likely to see one at your feeders in October and November. This species is very hardy and can survive colder temperatures than ruby-throated hummingbirds. This species is often reported in the east during fall migration season.
How do hummingbirds find feeders?
Chance of a Rare Species Sighting
Rare hummingbird species are more likely to show up late in the fall season. Birders have reported broad-billed hummingbirds and calliope hummingbirds. If you leave your feeder up, you might be the next birder to find an incredible rarity!
Next, check out jaw-dropping facts about hummingbirds.
Raw or cooked, fresh basil adds its own distinct, beloved flavor to any number of dishes. It’s one of those herbs that home cooks turn to so often that many have found it more convenient to grow their own so they always have a supply on hand. Whether you need only a few leaves to perk up a salad, or a whole bunch to create the ultimate homemade pesto, you may want your own handy supply in your garden or on your windowsill.
But are you treating your basil right? It’s an easy plant to grow, but if you’re looking at a spindly collection of stalks with few leaves, you might not believe it. And if you’re disappointed with the results of your cooking—you’re just not getting that famous enticing flavor you’re looking for in your fresh basil recipes—don’t despair! Here are some of the most common mistakes practically everyone has made when growing and cooking with fresh basil.
Mistake #1: You’re adding it too soon to your dish
When cooking with heat, the rule is to add dried herbs early and fresh herbs late. While dried basil takes time to soak up liquids and release its flavor, fresh basil leaves will simply wilt and lose their potency if cooked too long. With soups, stews, sauces and sautees, add the fresh basil in the last stages to add a final fillip of flavor—don’t count on it to be the base that other flavors build upon.
Mistake #2: You’re not using enough basil
If you’re substituting fresh basil for dried, adding it too soon is only one possible misstep—the other is not using enough. Drying concentrates the flavor of the herb, so you need less of it to produce the same flavor. Figure on tripling the amount of basil called for if you’re using fresh instead of dried.
Mistake #3: You’re throwing away the stems
The first step to prepping fresh basil leaves for use is to remove the stems, right? But if you’re tossing the stems away, you’re also tossing away some great opportunities to add flavor. While stems are too tough to use in a recipe that calls for leaves (and can be a little bitter), they make a good addition to soups, sauces and more. One option is to cut them fine and stir them into rice or couscous along with some butter and a little bit of salt.
Mistake #4: You’re using the wrong type of basil
One of the most common types of basil is sweet basil. It’s so common that it’s usually just labeled as basil. This is what you’ll usually find at the grocery stores. If a recipe simply calls for “basil,” sweet basil is the way to go. Other varieties can have stronger flavors that can give you an unintended result in your recipes.
Holy basil is best cooked (it can be bitter when raw), but purple basil is best raw as that pretty purple color turns black when cooked. Thai basil is stronger, with an anise flavor, while lemon and cinnamon basil are aptly named for the flavors they bring to the table. These varieties are growing in popularity, although more at farmer’s markets and for home garden growing. It’s best to start by mixing these varieties with sweet basil until you know how the flavors will affect your favorite recipes.
Mistake #5: You are refrigerating basil
One of the most effective ways to store fresh herbs and keep them fresher longer is to put them in a glass of water, then in a plastic bag, and put the whole thing in the fridge. Not basil, however! Basil will keep better at room temperature. Trim the leaves from the bottom of the stems and place the basil in a glass of water, much like you would flowers. Then just leave it on your countertop, out of direct sun, for a fragrant and pretty bouquet that’s ready whenever you need to add a leaf to your dish.
Mistake #6: You’re not freezing basil
Dried basil is an option for long-term storage, of course. But if you love the particular taste of fresh basil, you’re missing your chance for year-round summery flavor.
To freeze fresh herbs, remove the whole leaves from the stem, blanch them in boiling water, then immediately dunk them in an ice bath to stop them from cooking. Let them dry, then lay them flat between layers of waxed or parchment paper in a freezer container. You can use them throughout the year exactly as you would use fresh leaves. They’ll shrink a bit, but retain all the flavor, so don’t use quite as much frozen basil as the recipe calls for fresh.
You can also puree basil before freezing—use 1 Tbsp. of olive oil to each cup of basil. Pour the puree into ice cube trays and freeze to create quick, easy-to-use portions, and then place the cubes in a freezer bag or container. Thaw a cube to use in salad dressings or marinades, or drop one into a pot of soup for an extra burst of flavor. For an easy DIY gift idea, learn how to make basil salt.
Mistake #7: You’re not pruning enough
Basil grows quickly, and while it can be tempting to let that explosion of growth happen, it can lead to tall stalks with few leaves. Prune your basil plants every couple of weeks to encourage new leaves to continuously grow.
Mistake #8: You’re not harvesting enough—or too much.
As with pruning, you should harvest your basil regularly to encourage the growth of new replacement leaves. Start picking leaves early, and keep picking them! The best approach is to harvest a few leaves from each plant, rather than cutting off an entire stem from a single plant. If you need to harvest a larger amount—say, for a tasty pesto—work from the top down, cutting about a third of the plant’s height. Make your cuts right above a leaf, rather than below.
Mistake #9: You left the pretty flowers
The basil plant produces pretty purple-blue flowers. It may seem a shame to get rid of them, but if the plant is putting its energy into growing the flowers, it isn’t growing leaves. Be sure to pinch off the flowers as they form. Think of it this way—after the plant produces flowers (and more seeds), it has fulfilled its life cycle. Preventing the flowers from growing will not only encourage your plant to produce more yummy leaves, but will keep it alive longer. Here’s how to extend the gardening season and grow herbs indoors.
Mistake #10: You’re not feeding it enough
It’s almost impossible to overfeed basil plants. Compost, fertilizer, mulch… it loves it all. It will gobble down everything available. However, this also means that if you’re growing your basil indoors, make sure the pot isn’t sitting in water—basil is vulnerable to root fungus. The soil should be moist but not wet, as the basil will just keep drinking past the point of health.
Mistake #11: You’ve given it the wrong neighbors
Because basil is such a strong grower, it’s best to keep it away from other herbs in your garden—herbs like rosemary, thyme and others can be overwhelmed. Instead, pair basil with your tomato and pepper plants.
Basil growing conditions:
- Plant after spring thaw, when daytime temperatures reach over 70°
- Full sun (6+ hours per day)
- Space 10-12 inches apart
- Soil: Rich, moist soil that drains.
- Water regularly, but not to the point of sogginess. No standing water.
- Mulch and compost recommended; fertilizer not required.
- Protect during extreme heat; be sure to provide water during drought conditions.
According to the National Garden Bureau, 2020 is the “Year of the Hydrangea.” And we think that adding this new hydrangea variety to your garden is the perfect way to celebrate! The stunning ‘Wee Bit Giddy’ hydrangea was introduced by Proven Winners for home gardens this year.
Why We Love the Blooms
It’s a macrophylla hydrangea, which means the flower color can be changed based on the soil acidity. But forget the pale pinks and baby blues that you’re used to seeing on these plants. ‘Wee Bit Giddy’ delivers something much more thrilling. It was bred from two other macrophylla cultivars to create a plant with both vibrant color and reblooming flowers.
For the raspberry pink blooms, your soil should be alkaline with a pH of 7.0 or higher. Increase the acidity of the soil, and the flower color changes to deep violet. The flowers on this dwarf variety form large and neat heads against deep green foliage and stems. If your hydrangeas aren’t blooming, this could be why.
Where to Plant ‘Wee Bit Giddy’
This is a dwarf hydrangea that grows to about two feet tall with a two and a half foot spread, which makes the plant incredibly versatile compared to larger cultivars that require lots of space. ‘Wee Bit Giddy’ are stunning specimens in containers—they are the “thriller” in the container building design of thrillers, fillers and spillers. Or use them in your perennial garden as a border plant. Because they rebloom all summer long, they’re great to have in your garden as a colorful focal point when other flowers have faded midseason.

Plant several ‘Wee Bit Giddy’ hydrangeas together to create a stunning blanket of intense color. This is especially attractive as the color changes with new and fading blooms, as well as having a mix of alkaline and acidic soils so that flowers range from raspberry to violet. The blooms are also gorgeous cut or dried in bouquets.
Check out 6 hydrangea facts that even expert gardeners don’t know.
How to Grow This Hydrangea
‘Wee Bit Giddy’ will grow in zones 5 to 9. Plant these hydrangeas in well-draining soil in a sunny to partially sunny location. (In hotter locations be sure the plants get some protection with partial shading.) Add a layer of mulch at the roots and give the hydrangeas consistent waterings throughout the season. Fertilize the plants in early spring and late spring to encourage reblooming for the summer. Check out even more breathtaking hydrangea species you need in your garden.
Gardeners like to say that new hydrangeas sleep, creep, then leap—meaning that they can take a couple of years to reach their maximum potential. So don’t be discouraged if your hydrangeas are shy their first year. Your patience will be rewarded in seasons to come.
Should You Prune Your Hydrangea?
And because ‘Wee Bit Giddy’ blooms on old and new wood, pruning is not recommended, as you might accidentally cut away future blooms. Learn more about when to prune your hydrangeas.
Add this gorgeous hydrangea to your garden, and we feel certain you’ll be more than a “wee bit giddy” with how lush and colorful it becomes!
It’s hard to find an herb that is as well liked as basil. The distinctive flavor is often used in Italian dishes such as pesto, marinara sauces, bruschetta, pizza and so much more. Check out the top 10 herbs to grow in your garden.
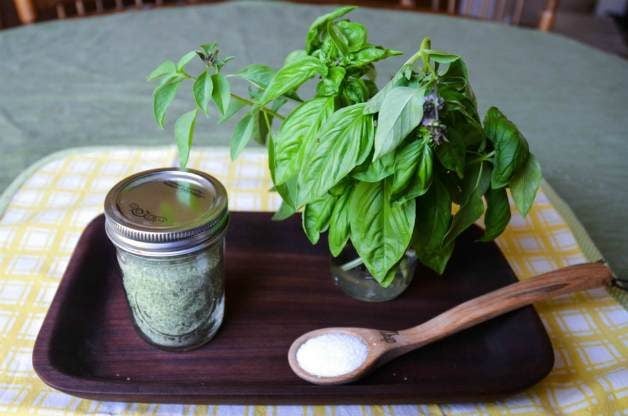
Many of us save a spot in our garden to plant some basil every year, where it is close by for us to add to our favorite recipes. Usually, basil leaves are torn, chopped or pureed. Today, I’d like to show you another way that you can enjoy the flavor of basil in your food—by making basil salt.
Basil salt is easy to make and contains only two ingredients—fresh basil and kosher salt. You will need a food processor, baking sheet and a glass jar to store your basil salt.
Are you ready? Let’s get started:
How to Make Basil Salt
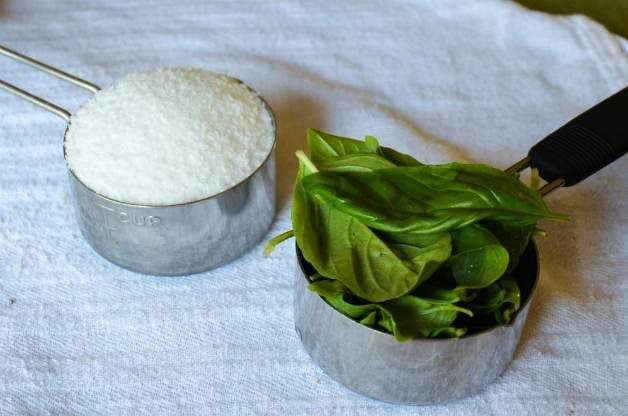
1. You will need 1/2 cup each of fresh basil leaves and kosher salt.
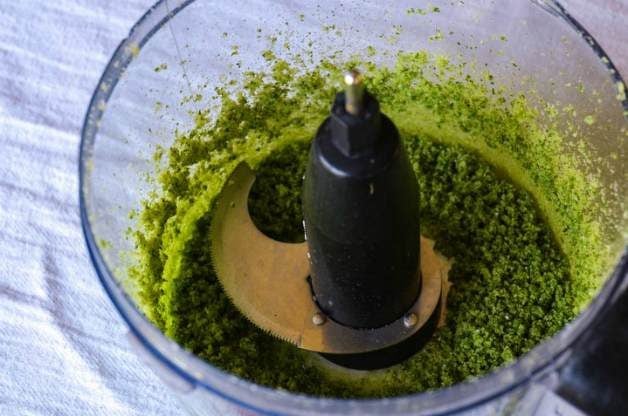
2. Puree the basil and kosher salt together in a food processor.
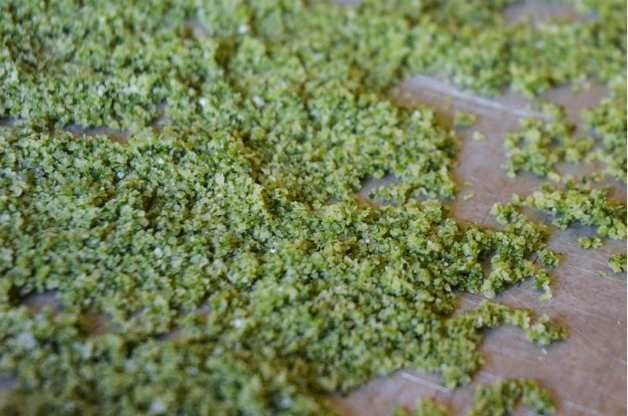
3. Spread the basil/salt mixture in an even layer on a baking sheet. Bake for 20 minutes in a 225 degree oven. This will dry out your basil salt. Lightly mix it up after 10 minutes in the oven, and then cook the mixture for another 10 minutes.
4. Put the mixture back into the food processor. Blend until finely ground. Tip—be sure your food processor is dry before adding your dried basil salt.
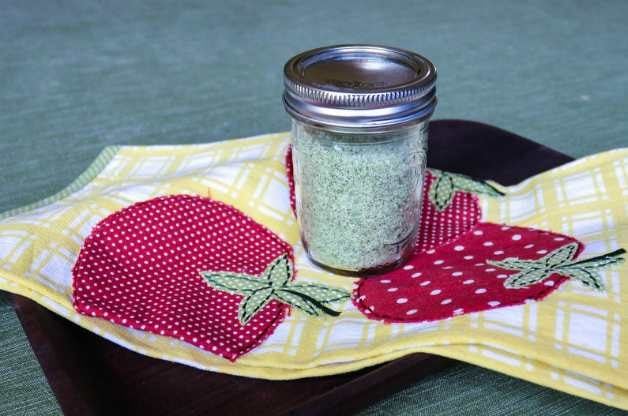
5. Put your finished basil salt in a glass container with a tight fitting lid, such as a mason jar. That’s it!
You can use basil salt to flavor Italian sauces, season ripe fresh tomatoes, or sprinkle on a pizza for extra flavor. Basically, you can use it in any recipe that calls for basil and salt. Next, learn how to freeze fresh tomatoes, step-by-step.
Basil salt is a great, inexpensive DIY vegetable garden project, whether you have a garden filled with basil, or you pick up a bunch at your local grocery store or farmer’s market. The best time to make basil salt is during the summer when fresh basil is growing. I make a lot of it in the summer and store it in a dark, dry place and give it away as gifts at Christmas. Here’s 5 more DIY garden gift ideas.
Extend your harvest when you plant these top fall vegetables! Some of these require longer growing seasons, while others can handle a little extra time in the ground while you deal with your abundance of summer tomatoes and zucchini. You’ll find lots of root vegetables on this list, along with squash and pumpkins, so prepare to enjoy a fall feast with these garden options.
Onions
Allium cepa
A garden without onions? It’s enough to make you cry. Sweet or sharp, onions lend zesty flavor to everything from stews to salads. And what’s finer than a slice of raw onion on a hot-off-the-grill burger? Not much, in our humble opinion.
Planting advice: Onions grow slowly, so get best results from sets—small bulbs less than 1 inch in diameter (though onions grown from seed last longer in storage). Plant when soil is workable, about 1 inch deep and 1 inch apart for green onions and 2 to 4 inches apart for slicing onions; rows 12 to 18 inches apart.
Harvest Tips: Mature in 100 to 120 days. Pull green onions when tops are 6 inches tall; for larger onions, when tops fall over. Let onions dry on the soil for a day, then put them in a box in a sheltered spot for a few weeks. Then bring inside and store in a cool, dry place.
Top Picks: Bermuda, Red Baron, Sweet Spanish, Walla Walla Sweet, Vidalia Sweet.
Tasty Heirlooms: Alisa Craig, Borettanna Yellow, Long Red Florence, Red Wethersfield, Yellow of Parma
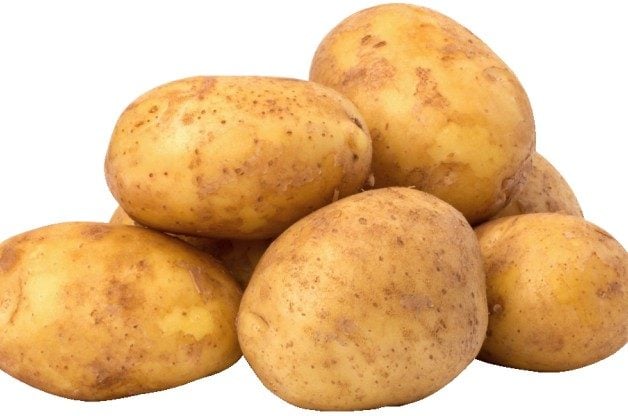
Potatoes
Solanum tuberosum
Mashed, baked, grilled or fried, potatoes are a staple for balanced, healthy meals. And they’re easier to grow than you might expect—and packed with fiber, minerals and nutrients. Just watch the butter and sour cream!
Planting Advice: Purchase disease-free seed potatoes for best results. Roughly six to eight weeks before the last frost date, or as soon as the soil is dry but workable, place either whole small potatoes or small pieces with at least one “eye” about 1 foot apart in a 1- to 4-inch-deep trench; space rows 2 feet apart. When shoots appear, cover with a ridge of soil.
Harvest Tips: Gently dig up tubers after the vines die; for “new” potatoes, dig earlier. Late-maturing varieties store better. Store in a cool, dark place with good air circulation. If eyes sprout, remove and move to a cooler location, or use immediately.
Top Picks: Norland (red skin, early harvest), Pontiac (red skin, summer harvest).
Tasty Heirlooms: All Blue, All Red, French Fingerling, German Butterball
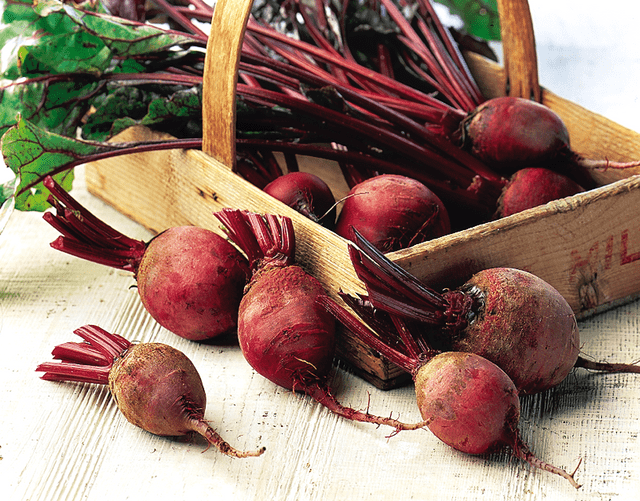
Beets
Beta vulgaris
No matter how you serve these sweet beauties— boiled, roasted, baked, pickled or in Russian borscht—you can’t beat beets for flavor and nutrition. Don’t waste the greens: Steam ’em, then toss with lemon juice and butter.
Planting Advice: A beet “seed” is actually a dried fruit that holds a bunch of seeds. Plant them in full sun and well-draining soil, about 30 days before the last frost date in spring, 1/2 inch deep and 1 inch apart, with rows 12 to 18 inches apart. Thin seedlings to one every 3 inches.
Harvest Tips: Beets mature in about 49 to 56 days. Pull mature fruits when they’re 11/2 to 3 inches in diameter. Store during winter in a bed of damp sand.
Top Picks: Early Bunch, Little Ball (miniature), Green Top Bunching, Crosby Egyptian (features tasty greens).
Tasty Heirlooms: Chioggia (candy-striped), White Albino (doesn’t stain!)
Discover the top 10 vegetables that grow well in shade.
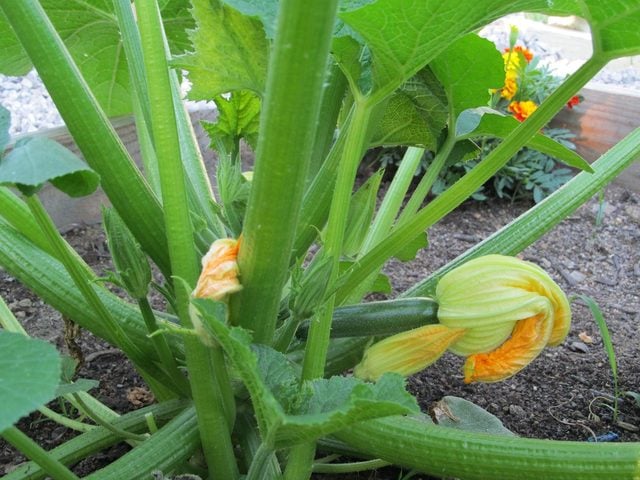
Squash
Cucurbita
There are two kinds of squash: summer and winter. Summer squash—like zucchini—are most tender and tasty when picked prior to maturation. Not so for hard-rind winter squash, such as acorn and butternut. But both kinds are serious allies for health- and taste-minded cooks.
Planting Advice: Squash require full sun and well-draining soil. For vining squash, sow four or five seeds in a 1-inch-tall hill after the threat of frost passes. When seedlings reach 2 or 3 inches tall, thin to two healthy seedlings per hill. For bush-type varieties, plant two to three seeds 1 inch deep every 24 to 36 inches, then thin to one plant every 24 to 36 inches.
Harvest Tips: Pick summer squash when fruits are 6 to 8 inches long and before they’re 2 inches in diameter (3 to 4 inches in diameter for pattypans and scallopinis). Pick frequently to promote greater yields. Winter squash take three or more months to mature. Pick when they turn a deep color and rinds resist easy puncture with a fingernail. Leave some stem attached.
Top Picks: Buttercup (winter), Cream of the Crop (winter acorn), Delicata (winter), Goldbar (summer straightneck), Peter Pan (scallopini), Stripetti (winter spaghetti), Sundance (summer crookneck), Table King (compact acorn winter bush).
Tasty Heirlooms:
Winter: Boston Marrow, Burgess Buttercup, Fordhook Acorn, Golden Hubbard, PA Dutch Crookneck, Turk’s Turban.
Summer: Summer Crookneck.
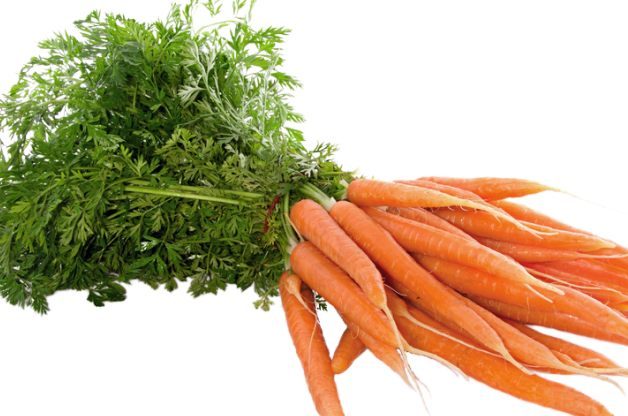
Carrots
Daucus carota var. sativus
Ironically, Mel Blanc, the voice of Bugs Bunny, didn’t care for carrots. What’s up with that? They’re packed with vitamin A—good for eyes and skin. And what about that satisfying crunch? Ahhh—it’s love at first bite.
Planting Advice: Three to four weeks before the last frost, sow seeds 1/4 to 1/2 inch deep, two to three per inch, in loose, well-draining soil; rows 1 to 11/2 feet apart. When sprouts are 1 inch tall, thin to two per inch for small varieties; one every 1 to 2 inches for larger carrots. To extend the harvest through fall, plant a new crop every three to four weeks until midsummer.
Harvest Tips: Ready to pick in 65 to 80 days. Harvest small varieties when roots are 1/2 inch in diameter, 1 inch for larger varieties. To store, cut off leafy tops 1 inch above roots and refrigerate.
Top Picks: Orbit (small round), Little Finger (baby), Red-Cored Chantenay, Danvers 126.
Tasty Heirlooms: Paris Market (round, reddish-orange), Scarlet Nantes, St. Valery
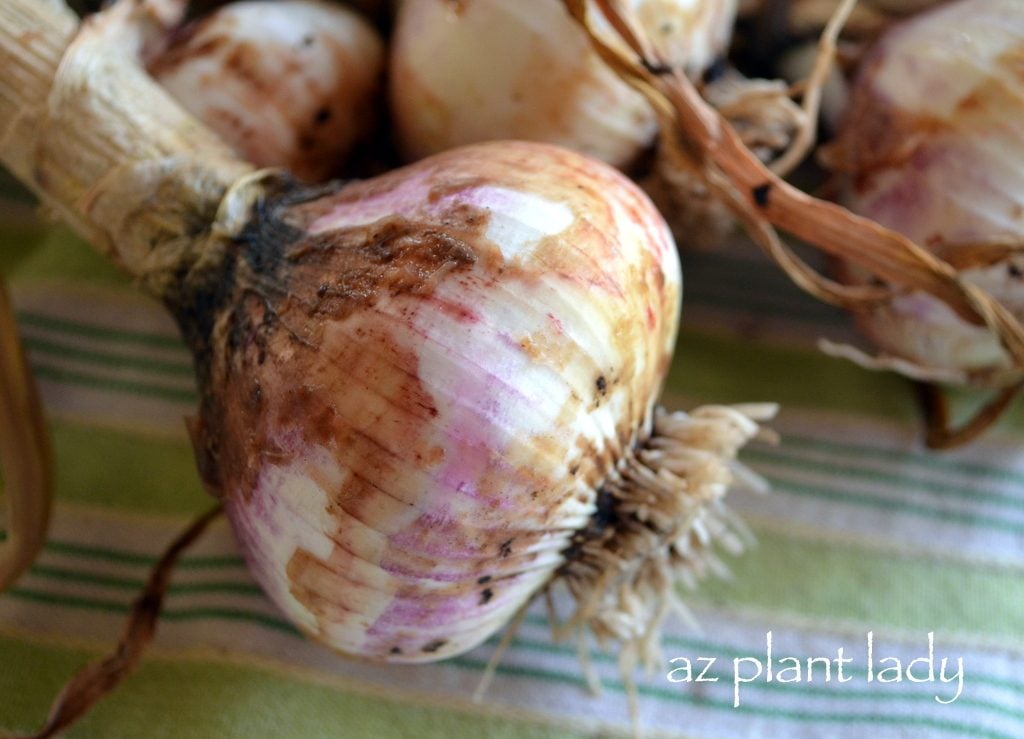
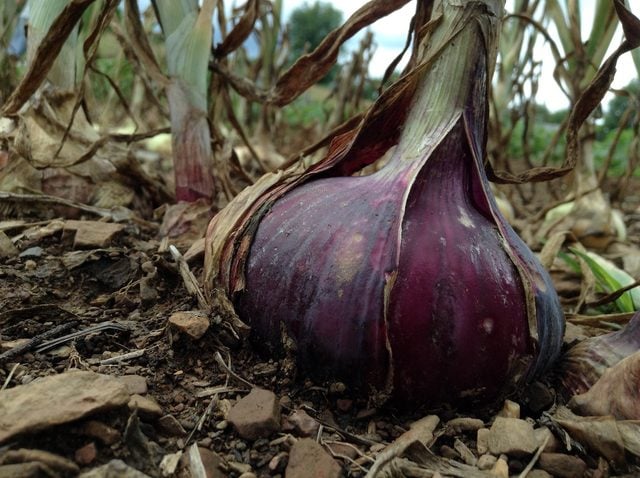
Garlic
Allium sativum
Greek athletes gobbled garlic before Olympic games for stamina. Modern-day studies prove them correct: Thanks to sulfur compounds, garlic is healthy—and, um, aromatic.
Planting Advice: In full sun and when soil is workable, plant individual cloves upright the depth of the bulb plus 1 inch of soil, 3 to 4 inches apart; rows 1 foot apart. In areas with short growing seasons, plant in late fall to grow larger bulbs for next-summer harvest. Cover with mulch over winter. Next growing season, cut off seed stalks to direct more energy to bulbs.
Harvest Tips: Harvest in about 100 days, when most leaves are brown. Gently dig up plants, with bulbs and leaves intact; dry for a few days, then tie in bundles and cure in well-ventilated area. Store in cool and relatively humid place.
Top Picks: Carpathian, Inchelium Red, Metechi, Idaho Silverskin.
Tasty Heirlooms: Broadleaf Czech, Georgian Crystal, German Extra Hardy, Shvelisi-Chesnok Red, Siberian
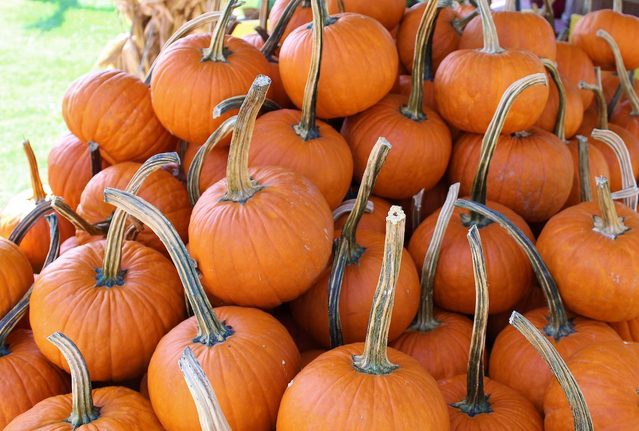
Pumpkin
Cucurbita spp.
Pumpkins are a triple threat: Toasted seeds provide a tasty, nutritious snack, the flesh is great for pies and the rinds become a canvas for Halloween artists. And with smaller varieties, tiny yards aren’t as much of a deterrent to growing these squash cousins. So carve out some space and let ’em grow.
Planting Advice: When frost danger passes, plant four or five seeds 1 inch deep in an 18-inch-high mound of soil. Keep hills 5 feet apart for vining pumpkins and 3 to 4 feet for semi-vining types. When seeds sprout, thin out to healthiest two or three.
Harvest Tips: Pick in 100 to 110 days, when they’re a deep, solid orange (for most varieties) and the rind is hard, usually late September or early October. Leave a 3- to 4-inch stem, which helps the fruit keep longer.
Top Picks: Autumn Gold, Baby Bear, Howden’s Field, Sweetie Pie (small fruit), Mammoth Gold.
Tasty Heirlooms: Amish Pie, Big Max, Casper (white), Fairy Tale, Green-Striped Cushaw, Long Island Cheese, New England Pie, Yellow of Paris
Learn 5 fascinating facts about pumpkins.
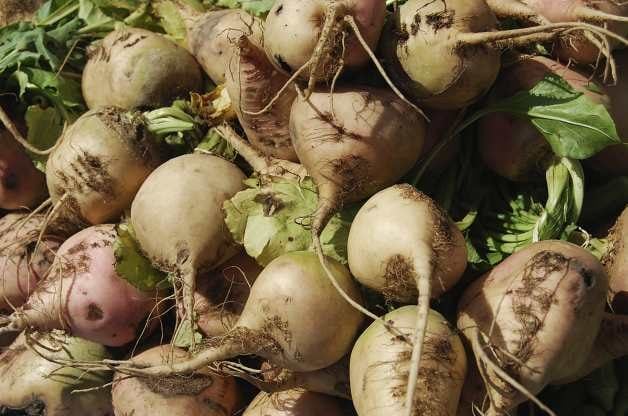
Rutubaga
Brassica napus
Larger, denser and sweeter than its root-veggie relative the turnip, these purple or creamy-brown palate-pleasers are actually a cross between a cabbage and a turnip. Also known as Swedish turnips, rutabagas are tasty in stews or as side dishes. Just for giggles, boil and mash some ’bagas, then blend them with mashed potatoes and ask dinner guests to guess the flavorful mystery ingredient. Good times, indeed!
Planting Advice: For summer harvest, plant seeds as soon as the soil is workable. For a fall harvest, plant roughly 100 days before the first expected frost. Sow seeds in full sun and well-draining, loose soil, 1/2 inch deep and 1 inch apart; keep 18 to 24 inches between rows.
Harvest Tips: Rutabagas mature in about 90 days. For optimal taste and tenderness, dig them up when they’re 3 to 5 inches in diameter. They’ll tolerate frost; in fact, when it comes to taste, cool weather sweetens the deal. Rutabagas keep well when refrigerated.
Top Picks: Altasweet, Improved Long Island, Pike.
Tasty Heirlooms: American Purple Top, Laurentian
Discover 5 common mistakes in the backyard vegetable garden.
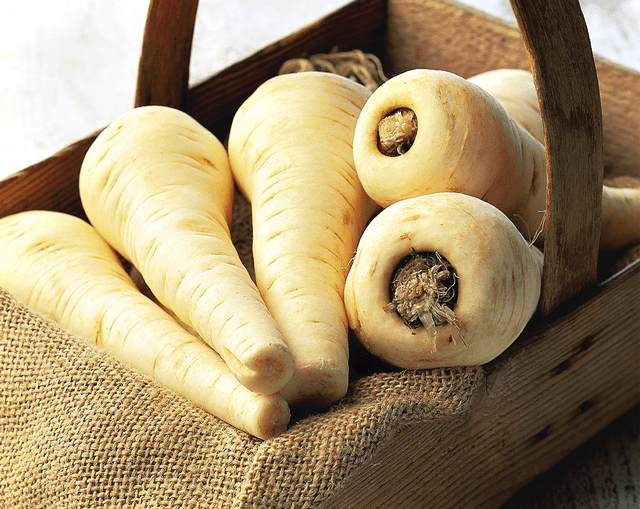
Parsnips
Pastinaca sativa
With their sweet, delicate flavor, these carrot cousins are great when grated in salads, added to soups and stews and served on the side—roasted, steamed or mashed. You can swap them for carrots in many recipes.
Planting Advice: Parsnips germinate poorly, so soak seeds for a day and sow thickly. To determine a planting date, count back 100 to 130 days from just after expected first-frost date. Plant seeds in full sun to light shade in well-draining soil, 1/2 inch deep; rows 18 to 24 inches apart. Thin to 3 to 6 inches apart.
Harvest Tips: Carefully use a spading fork to harvest when roots are 11/2 to 2 inches in diameter and 8 to 12 inches long; for best flavor, wait until 2 to 4 weeks after near-freezing temperatures occur, but before the ground freezes. Or cover with mulch for winter and harvest in spring, after ground thaws.
Top Picks: Andover, Cobham, Improved Marrow, Harris Model, Lancer.
Tasty Heirlooms: All American, Hollow Crown
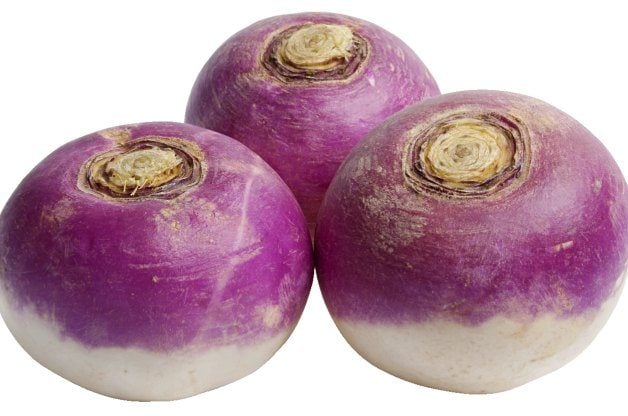
Turnips
Brassica rapa
Turnips are the vegetable world’s near equivalent of an all-in-one vitamin pill. They’re loaded with vitamin C—twice as much per serving as orange juice, as a matter of fact—as well as calcium, iron and thiamine. Even the greens are rich in vitamins and antioxidants. This veggie is fun to eat as a raw, crunchy relish; roasted; or boiled and mashed. Dig in!
Planting Advice: For summer harvest, plant seeds when soil is workable; for fall, about 80 days before first frost. Plant seeds densely in full sun and well-draining soil, 1/2 inch deep; rows 12 to 24 inches apart. When seedlings are 4 to 5 inches tall, thin to 2 to 4 inches apart.
Harvest Tips: Most turnips mature in 35 to 75 days. Harvest when they reach 2 to 3 inches in diameter. They tolerate fall frosts and become even sweeter in cool weather.
Top Picks: Gilfeather, Just Right, Scarlet Queen, White Night. Just for greens: Alltop, Shogoing, Topper.
Tasty Heirlooms: Golden Ball, Purple Top White Globe, Seven Top, White Egg
Winter Birding Hotspots
When it comes to winter birding, you have two options: Embrace the cold weather or avoid it entirely. For a full dose of winter birding in crisp temperatures, Sax-Zim Bog, northwest of Duluth, Minnesota, is the place to be. You might not tally more than 50 species during your visit, but the unique birds you will find, including snowy owls, great gray owls and northern hawk owls, will more than make up for it.
If you’d rather migrate south like the birds, try Florida or the desert southwest. Birding locations in these areas are almost as abundant as the birds themselves. Florida’s Everglades National Park, J.N. Ding Darling National Wildlife Refuge and the first National Wildlife Refuge, Pelican Island, are ideal destinations for water birds such as the roseate spoonbill and the sanderling.
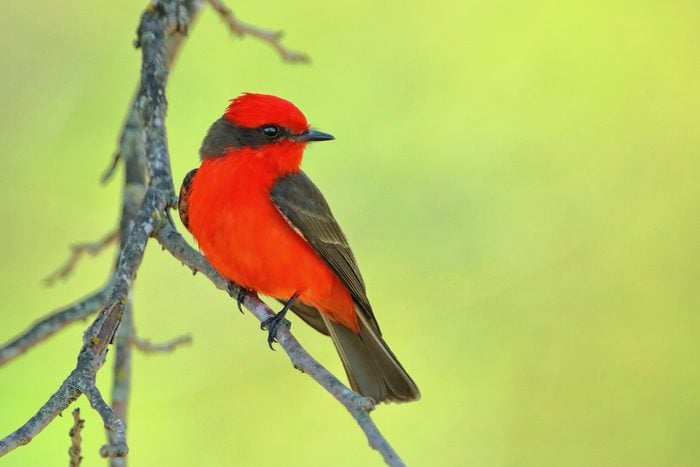
In the Southwest, some of my favorite places for winter birding are Saguaro National Park in Arizona, home to vermilion flycatchers, and the Bosque del Apache National Wildlife Refuge in New Mexico.
Really get in the spirit of winter birding with the Christmas Bird Count, the longest-running citizen science project in the world. This partnership among the National Audubon Society, Bird Studies Canada and the Cornell Lab of Ornithology began in 1900. Now there are nearly 2,500 count circles each winter.
Spring Birding Hotspots
Whatever you do, don’t step outside in spring without binoculars. Spring is the best season for migration, and one of the earliest migrations is the most spectacular. In March, more than 500,000 sandhill cranes, along with ducks and geese, congregate along the Platte River in central Nebraska. It might not feel like spring behind the bird blind, though; temperatures often dip below freezing, so bundle up for this incredible experience.
Watching a concentration of spring migrants, you’ll feel as if you’ve won the birding jackpot. Dozens of songbird species refuel along the coast in Texas, Louisiana, Alabama and Mississippi after making the nonstop flight over the Gulf of Mexico. Northwest Ohio has birds galore, especially warblers, which cluster on the southern shore of Lake Erie before moving north.
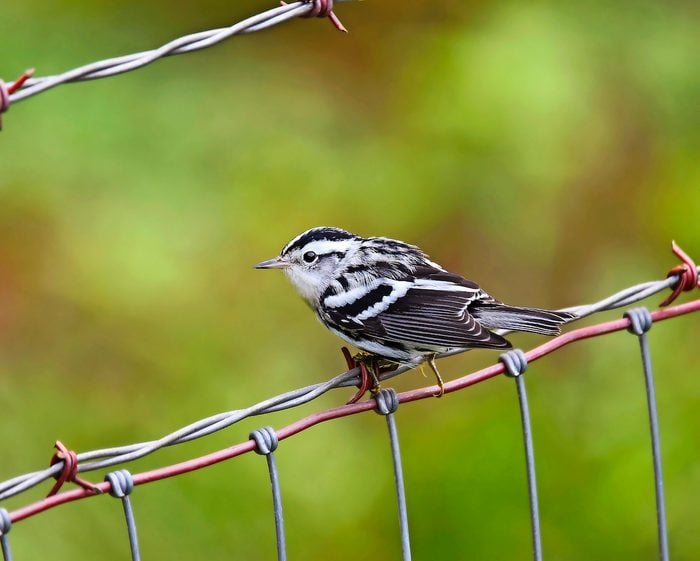
Even if you can’t go far this spring, you can search for the migrating birds that come your way. Hit your local park; scope out your neighborhood. If you’re paying attention, you’ll see birds on the move. I’ve nearly been late for work because I couldn’t tear myself away from the constant movement of migratory birds flitting through the trees in my own backyard. One spring, I spotted magnolia, black-and-white, Canada and yellow-rumped warblers in a single flock. Check out 25 photos of warblers you should add to your life list.
Summer Birding Hotspots
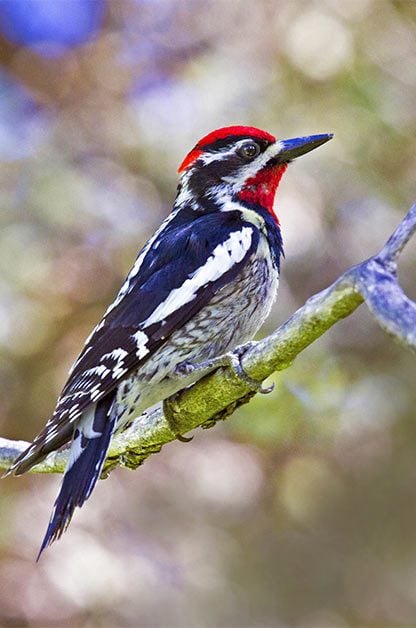
A trip to a classic vacation destination can easily turn into a unique bird-watching opportunity. The western mountain national parks, including Glacier in Montana, Yellowstone and Grand Teton in Wyoming, and Rocky Mountain in Colorado, are great places to see high elevation species. Look for red-naped sapsuckers and black-backed and three-toed woodpeckers while you hike through the forests. Keep an eye out along mountain stream rapids in case an American dipper is bobbling along with you.
Prefer the coasts? National wildlife refuges dot the Pacific and Atlantic shorelines like pearls on a necklace. You can explore urban nature habitats, including San Diego Bay National Wildlife Refuge in California and Chincoteague National Wildlife Refuge in Virginia, by bicycle. Check out more spectacular national park birding sites.
Autumn Birding Hotspots
The Midwest is the ideal region for fall. Quivira National Wildlife Refuge and Cheyenne Bottoms Wildlife Area in central Kansas are legendary stopover locations for shorebirds, ducks and geese, which gather by the thousands. These areas also see the occasional whooping crane. And don’t forget the Mississippi River, which is like an interstate highway for birds in fall.
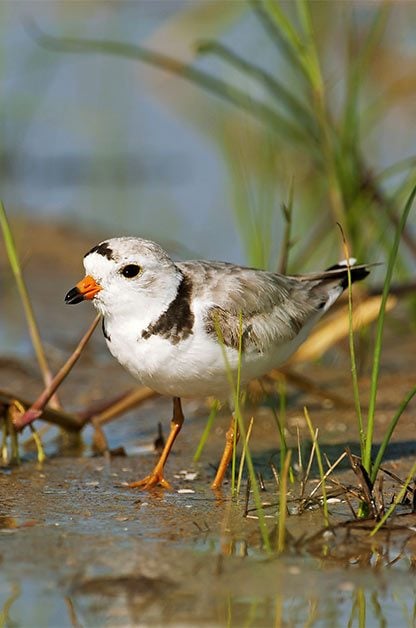
To see birds against a vibrant backdrop of fall color, head to Acadia National Park in Maine or the White Mountains of New Hampshire. Or follow migrants down the Atlantic Coast to Cape May in New Jersey and Kiptopeke State Park in Virginia. An array of migrants, from piping plovers to peregrine falcons, move south along the East Coast all autumn.
Whether you tally the birds visiting your feeder or explore the back roads of the count circle, make your local Christmas Bird Count a yearly tradition. One of my favorite memories was spotting a pine grosbeak while snowshoeing in Wyoming for a Christmas Bird Count. What a great end to a year of bird-watching!
Check out the top 5 birding hotspots for fall migration.

Top Birding Destinations by Month
Visit these locations when the bird-watching is at its finest.
January
Sax-Zim Bog, Minnesota
February
Everglades, Florida
March
Platte River, Nebraska
April
Point Reyes National Seashore, California
May
Magee Marsh, Ohio
June
Chincoteague National Wildlife Refuge, Virginia
July
Grand Teton National Park, Wyoming
August
Denali National Park, Alaska
September
Horicon Marsh, Wisconsin
October
Acadia National Park, Maine
November
Rio Grande Valley, Texas
December
A local Christmas Bird Count